Wire Guide

Wire Guide Awnings are a cost effective outdoor blind to achieve that modern industrial look. These straight drop awnings are suitable for expansive windows and outdoor areas that require sun protection and privacy.

The benefit of the wire guide system is that it allows the blind to be dropped to any particular height without it moving in a breeze. The stainless steel cable and fittings are corrosion resistant and tie in well with stainless wire balustrading. These awnings can be motorised or crank operated to meet any homes needs.

Application Ground floor and upper level verandah/pergolas
Operation Crank operation, Motorisation
Fabrics Screen / Canvas / Acrylic
Hardware Cassette / Hood (optional), L Bracket, Stainless Steel (Std) Wire to suit, Stainless Steel, Weather strip (optional)
Finish Exposed bottom rail


*Available in 3 different fixing options:
L brackets(Standard), masonary kit and deck plates

Side Channel Awning

Side channel awnings are an entry level blind. These awnings offer great flexibility due to multiple locators in the side channel allowing the blind to be locked into semi dropped positions. The componentry is available in 5 colours and powder coating upon request enabling seamless coordination with any façade. An optional coated steel hood for extra protection.

Application Ground floor
Operation Hand Operation
Fabrics Screen / Canvas / Acrylic
Hardware Cassette / Hood (optional), Side Channels
Finish Exposed bottom rail


PVC

PVC blinds are a versatile product that can take traditional outside areas and create contemporary outdoor rooms. With clear or tinted window like material these blinds allow the merger of outdoor living inside. These outdoor blinds work well not only in the home but also for cafes, bars and alfresco areas. Operated by rope and pulley these blinds can quickly be adjusted to suit all weather conditions.

Application Ground floor and verandah/pergolas.
Operation Rope and Pulley
Fabrics PVC
Hardware Rope track, sash cord, Pulleys cleat, Strap Adaptors, Straps, Breaching Staples
Finish Plain finish


Strap Down Awning

Strap Down Awnings are the perfect product selection if posts or pillars are not available for the installation of guides. Strap Down awnings reduce heat and glare and can be locked into position with clips or straps. With a huge range of fabric styles and colours available, these affordable outdoor blinds create functional and enjoyable spaces.

Application Ground floor only/verandah/pergolas
Operation Crank operated, Pull down stick, Motorisation
Fabrics Screen / Canvas / Acrylic / PVC
Hardware Hood, Universal fixing bracket (If No Hood), straps, strap adapter, breeching staples. Stainless Steel (Available upon request)
Finish Scallop, Straight flap with bias, Straight flap hemmed, Exposed bottom rail, Plain finish


Folding Arm Awning

Folding Arm Awnings are the perfect blind for increasing you outdoor living space. These awnings are most suitable for applications where sun protection is required without the obstructions of posts and beams. They are most suitable where sun and weather protection is required. Folding arm awnings complement decks, patios and courtyards to form beautiful and functional areas. Viewscapes folding arm awnings can be motorised or crank operated with additions of wind and sun sensors to protect your investment. These awnings are available in a range of contemporary colours to coordinate with any home style.

Application Deck, Patio, Alfresco Areas
Operation Manual (crank operation), Motorisation
Fabrics Acrylic
Hardware Hooding (optional), sun/wind sensor (optional)
Finish With or without valance/flap


  • Roller Blinds Fitting Instructions

    Pdf buttons fitting instructions  Pdf buttons fitting instructions

    For installation details please download the fitting instructions above, or see your local distributor for further measure and installation details.

    If installing on plaster or wallboard where possible pick up timber stud. If unable to locate stud, use a suitable wall plug or toggle for plasterboard to hold the brackets.

    Face / Architrave Fit:

    Spring Operated – the top edge of the brackets should be 35mm above the opening. Spring spade is always located on
    the left side for under roll and on the right for over roll blinds.
    Check your blinds pin measurement. This is the measurement from the end of the blind to the
    other, taken from the outside of the end pins. Position the brackets in the correct position:
    Chain Operated – the top edge of the brackets should be flush with the top of the architrave.
    Avoid affixing screws into the angle join of the architrave. Raise or lower the brackets if necessary to avoid this. 

    Recess Fitting:

    Side or Back fixing

    Position the bracket so that the top edge is a half roll diameter down from the top of the recess.
    Check the pin measure of the blind. This is the measurement from the end of the blind to the other,
    taken from the outside of the end pins. Transfer this measurement to the window to determine whether the brackets
    should be top, side or back mounted.

    Top fixing

    The brackets should be installed with the slotted screw holes nearest to the window. The edge of the
    brackets that are nearest to the window should be a half a roll diameter less 15mm from the back of the recess.

    Mark through the elongated screw holes of the bracket and drill using a 2.5mm drill for the timber fixing, or an
    appropriate size masonry drill if plug fixing. Screws must be at least 25mm from the edge of masonry to avoid splitting.
    Secure the brackets into position – each one with one screw only, through the slotted holes to allow for adjustments.
    When satisfied with the position, drill through the round holes and secure with additional screws.

    Mount blind to brackets:

    Spring Operated

    Fit pin into its bracket first (right for standard roll, left for reverse roll). Fit spade end into its bracket.

    Chain Operated

    Fit the chain control end into the bracket with the ‘spade’. Whilst holding the blind with one hand, turn
    the idle end until the pin withdraws into the roller cavity. Align this end with the bracket and turn the idle end again until
    the pin re-emerges and fits into the bracket. Install cord tension device. Snap on Ball Stops to the chain at appropriate
    position to keep the blind operating within its limits. Ball Stops prevent over unwinding of fabric that, in extreme cases,
    may cause the fabric to come off the roller.

    Rolling up straight - How to balance the blind

    For blinds that are narrow with long drops; with ratios more than 1:2.5 (width: drop), there is a tendency for the blind to
    roll to one side. Frequently, windows can be out of square; therefore, final on-site adjustment may be required even
    though the blind has been carefully balanced at the factory. The way to re-balance - Locate the end with the overlapping
    edge exposed. Roll down the blind and apply a piece of masking tape on to the aluminium tube at this end. Roll up the
    blind and check that the blind is now rolling up straight. More tape can be added or removed to ‘fine tune’ the balance.
    Note: Fine tuning should NOT require more than 3 full pieces – please ring Contract Blinds for further advice.

    How to install the Cord Tension device

    The Tension Device reduces the chance of strangulation by limiting access to the control cord or chain. When fitted
    properly it should hold any looped controls firmly tensioned against a wall or window frame. This should make it hard for a
    young child to fit though the controls.

    Clip the cord / chain through the bottom of the Tension Device. Position the Tension Device on the window frame or wall
    in a position that will not compromise the operation of the control cord / chain. Make sure the controls are not twisted
    when the Tension Device is in the mounting position. Ensure that there is SUFFICIENT TENSION on the chain/cord –
    however excessive tension will impair smooth operation of the blind. Hold the Tension Device in the correct position, as
    shown. Insert and secure the screw through hole. Make sure the screw is affixed into a solid surface.

  • Pelmets

  • Roller Blind Colours & Fabrics

    Colours and Fabrics
    Choose from plains, textures, jacquards and prints, blockouts, fabrics with clean lines or more distinctive patterns to make a fashion statement in your home. The fabric you choose for your blinds allows you to take control over the amount of privacy and light that you want to achieve.

    See more information on fabrics.

  • Roller Blind Styles

    Styles
    We custom-make all our blinds to order, so you can choose the style that best suits you and your room. Visit your nearest distributor for further details.

  • Motorisation

    Motorisation
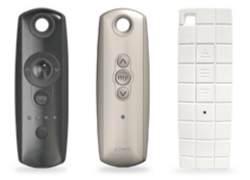
    Motorisation of blinds is growing in demand. Most of our products – internal and external – can be motorised. We carry a full range of Somfy product and Viewscape motor solutions. In addition to modern remote controls it is possible to control blinds with wall switches, light sensors, timers, sun sensors, wind sensors and home management systems.

    roller detail motorisation

  • Roller Blind Fittings & Sizing

    Fittings
    We make blinds we can be proud of, down to the smallest component. We only use quality fittings and materials to ensure we deliver a superior product – every time.

    roller detail
    Size
    We custom-make all our blinds to order, ensuring the perfect fit. Visit your nearest distributor for further details.

Back to top